
| WebOPSS Context-Sensitive Help | Version 3.1 | June 12, 2012 |
Click the link for general information on Templates.
Data islands are sets of information that help comprise authorizing documents and templates. While templates can be created without data islands, a data island must already exist before it can be attached to a new template.
There are essentially three main operations that build a data island:
To Search for Data Islands Using the Filter at the Top of the Screen:
Figure 6.2: Template—Data Islands
To Build a Data Island That Draws From System Data:

Figure 6.3: Create a New Data Island
NOTE: At any time, the Tables and Columns and Conditions fields can be cleared by clicking Clear.
HINT: This selection should match the type of control that will be used when creating the template.
HINT: The valid characters for the Data Island Name field are “0-9,” “a-z,” “A-Z,” and underscores. Blank spaces are not permitted. For example: Data_Island_Name.

Figure 6.4: Add New Column

Figure 6.5: New Column
HINT: To change a column, click on the blue, underlined text in the Expression column. The cascading list of tables/columns appears. Select the desired table/column.

Figure 6.6: Change Column Name
HINT: The new name must be applicable to the Expression. For example, if the Expression is “CertificateAirportID,” the system will not allow the name to be changed to “EngineTypeID,” since there is no relationship between airport IDs and engine types.

Figure 6.7: Sorting Options

Figure 6.8: Query Format
NOTE: Both boxes can be checked at the same time. If Group By is checked, repeated entries are only shown as one entry. (For example, if there are three A’s in the table column, they are combined as one A entry.) If General Query is not checked, the Certificate ID must be set up in order to save the data island.
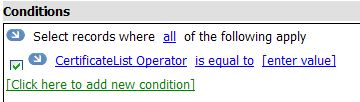
Figure 6.9: Add Query Conditions
HINT: The “Conditions” field has the same cascading list functionality as the “Tables and Columns” sections, so that hovering over one table reveals any associated columns.
NOTE: At least one Table and Column must match the Table and Column selection made in the Tables and Columns field above.

Figure 6.10: Modifying Conditions

Figure 6.11: Condition Search Criteria

Figure 6.12: Value Search Criteria

Figure 6.13: Enter Value
NOTE: To enter a value, the user must know the value of a table’s key. For example, the designator ID “DALA” or certificate ID “26228” for Delta.
HINT: The test results are read-only. Users should make sure to verify them.
To Build a Data Island Containing Text Options:

Figure 6.14: Selecting Look-Up List Option

Figure 6.15: Data Islands with Text Options
NOTE: The top list displays all the possible data island text values that can be added to the new data island. The (default empty) bottom list displays the active values for the data island. For example, though the top list may show a total of 1,000+ values, if only 3 values are added to the bottom list, those 3 values are the only options that will appear for selection when the data island is used in an authorizing document template. For more information on Templates, see "Templates ".
HINT: The valid characters for the Data Island Name field are “0-9,” “a-z,” “A-Z,” and underscores. Blank spaces are not permitted. For example: Data_Island_Name.

Figure 6.16: Activating an Existing Text Value
 ) to move the value to the active value list. The value appears in the active value list:

Figure 6.17: Active Value List
NOTE: Adding plain text values are for short amounts of text (i.e., text that is not a lengthy paragraph), such as those used in most dropdown lists or radio buttons; this includes options consisting of a few sentences of text. This is how the majority of option values should be entered.

Figure 6.18: Adding a (Plain Text) Value
NOTE: Clicking Save merely saves the text value to the top list of data island text values. Clicking Save and Add not only saves the text value but also adds the value into the bottom list, making it an active value for the data island being created.
NOTE: Adding formatted text should only be used for long paragraphs of text that require specific formatting to be applied. This will only be used in rare cases.

Figure 6.18: Adding a Formatted Text Value
NOTE: Clicking Save merely saves the text value to the top list of data island text values on the DataIslands—New page. Clicking Save and Add not only saves the text value but also adds the value into the bottom list on the DataIslands—New page, making it an active value for the data island being created.

Figure 6.19: Changing Active Text Value Order
HINT: Users may with to rearrange the display order of mutiple values in the active value list after the values have been added.
To Copy a Data Island:

Figure 6.20: Copying a Data Island
To Edit a Data Island:

Figure 6.21: Editing a Data Island
NOTE: Selectable options can only be edited in the complete value list in the middle of the page. If users intend to edit a selectable option that is currently an active option, users will first have to remove it from the active value list at the bottom of the page. To do so, users must select the desired option in the active value list and click the up arrow ( ) to move the value to the complete value list.

Figure 6.22: Editing an Option as a Value

Figure 6.23: Editing Value Text
 ) to move the value to the active value list. The value appears in the active value list.
Figure 6.24: Editing an Option as Formatted Text

Figure 6.25: Editing Formatted Text
) to move the value to the active value list. The value appears in the active value list.
To Delete a Data Island:
NOTE: Some data islands are unable to be deleted, though they can be successfully edited or copied. For these un-deletable data islands, the delete icon will be inaccessible (grayed out). Only data islands with red delete icons can be deleted.

Figure 6.26: Deleting a Data Island
To Change a Data Island Control Type:
NOTE: When editing a template, for a small subset of controls, the user can add the data island with a control it was not associated with when first created, allowing the controls to share data islands. Combo Box, Dropdown List, Textbox (AJAX), Radio Button, and Check Box control types can share data islands (e.g. If the user adds a Combo Box data island, it will be available under the Control Type list for Dropdown List, Textbox (AJAX), Radio Button, or Check Box control types.
Only Combo Box, Dropdown List, Radio Button, and List Box control types are interchangeable, meaning that users can interchange these controls in-place without having to delete and add the data island again for Draft and Active templates. Remember that data islands cannot be deleted or added for Active templates.

Figure 6.27: Template Library

Figure 6.28: Selecting Image Properties

Figure 6.29: Selecting a New Control Type
NOTE: Operators that currently have the document open in the Authorizing Documents Workspace (as the data island control type is changed) will not be affected; the next time they open the document to edit, the new control type will be available.
| Federal Aviation Administration |